How to place floating platform

One of the benefits of laminated flooring is its easy installation, making it one of the most popular floor coverings. However, not all of us have the same DIY skills, for this reason, it is good to know the recommendations of the experts on how to do the assembly correctly.
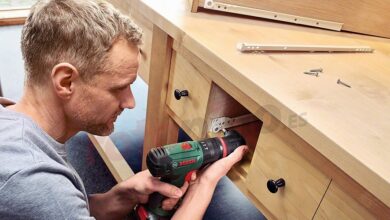
The installation of floating flooring requires the use of certain tools and utensils, such as a false square, hammer, jigsaw, sander, pulleys, among others. As in the installation of floating parquet, in this case some materials are also necessary, among which are adhesive tape, baseboards, insulation and, of course, the sheets of wood. Let’s see step by step how to put the floating platform.
take the measurements
This step is essential to be able to buy the correct amount of materials, so that you can make a fair investment. As a general rule, it is better than a little, but any excess implies greater expense, for this reason you have to pay attention when taking the measures. A good trick is to divide the area into different zones, for example, room, closet and entrance, in this way it is easier to take the measurements of each space with a tape measure and calculate the necessary materials, ensuring that nothing is missing.
Clean work area
The laminated flooring can be installed on almost any surface, however, first you have to clean the space, not only to carry out the work in a comfortable and organized way, but also to obtain a more professional result. For example, if you have removed a carpet, it is possible that nails and traces of glue remain on the floor, so you should proceed to clean the entire surface. The idea is that there are no obstacles in the work area, so the skirting board must also be removed.

Prepare the ground
This is a very important part when laying a floating floor. Once you have a clean surface, you must prepare the floor to place the wood with greater confidence. In this sense, you must make sure that there are no wet areas caused by pipe leaks, otherwise, you will have to repair them and let them dry before installing the floating wooden floor.
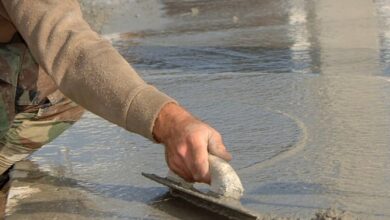
If you are going to lay the wood on concrete, remember that this material always retains some moisture, so one of the DIY tricks in this regard is to apply an asphalt-based treatment to the entire floor, since the wood can deteriorate. and even accumulate microorganisms due to humidity. This is more common in predominantly cold climate areas.
When you are sure that the floor is free of moisture, it is time to place the insulation layer, which serves as a protector for both acoustics and temperature. This is a material made of felt, polyethylene or polystyrene that you can easily find in physical stores and online. You just have to cut it into strips of different sizes and cover the floor using adhesive tape to join the pieces. If you don’t know how to lay laminate flooring over tile, the good news is that the procedure is the same.
Place the slats
Although the laminate flooring boards can be fixed with nails and adhesives, most current models come with a click system, which makes the job much easier. If you are wondering where to start laying laminated flooring, you should know that experts recommend starting in one of the corners of the place, however, you must leave a margin of expansion on the edge of the wall, which can be 10 mm or simply place small pieces of the same wood between the slats and the wall, as wedges. This space prevents deformations from appearing on the floor due to the natural effect of wood expansion.

If the planks do not have a click system, then you must apply special wood glue in the groove of the next board and place it next to the first one. Then you can tap firmly but gently with a hammer until the slats fit properly. To protect the material from impacts, you can place a wooden block between the blade and the hammer. Also, it’s important to have a damp cloth handy to quickly wipe off excess glue.
However, if you have chosen slats with a click system, then the installation is much simpler. In theory, it is a matter of inserting the male side of the second piece into the groove of the first at an angle of approximately 25º, and then lowering it. As for the orientation of the installation of the laminated flooring, it depends on your preferences, but it is considered simpler and more aesthetically attractive to choose the longest side of the room and place the slats in that direction. It is worth mentioning that these modern sheets are easy to remove and there is no need to damage the material during future disassembly.
You can make different designs with the wooden slats, but the best thing to do if you are a beginner is to start with a full slat, make the second row with half this size and the third with a slat that measures half the size. the second. Thus, it is possible to create an easy-to-remember pattern with a sober finish.
Install the skirting board
Placing the skirting board at the end is recommended, but if you don’t want to dismantle the old skirting board, you also have the option of using a skirting board, which is used to cover the existing one. Another solution is to place a wooden or PVC bead, which has a rounded finish and serves to cover the joint between the baseboard and the floor. To install these pieces you can use mounting adhesive.
end finish
It is normal that when you finish you see sawdust shavings and other remains of the work, therefore, it is advisable to vacuum the entire surface. In this sense, it is good to know that some Nilfisk, Dyson and other vacuum cleaners have special nozzles with brushes for wood. Finally, you can apply a special product to give shine and preserve the material.